Turkey cooking, methods, recipes, and more
Let’s talk turkey, literally! The Thanksgiving food item most people get worried about is the turkey. How to roast a turkey? How long to cook a turkey? Should I brine my turkey? What size turkey do I need? How to best thaw a turkey? How to thaw it quickly? What to do when it’s still frozen inside. When is it done? Will it be dry?
All great questions and you can find the answers below.

And the questions compound the more you think about it. Well, this holiday I invite you to sit back and let me do the worrying for you while you prepare the best turkey you’ve ever eaten.
With the tips, tricks, and recipes found here, you’ll have the most golden and crispiest turkey this side of the equator.
How much meat do I need?
Selecting the amount of turkey per individual can feel like a math problem, especially if you aren’t exactly sure of the number of people joining you. Don’t worry here is the rule of thumb I follow:
1 lb per adult and 1/2 lb. per child.
However, I love leftovers so if you’re like me and want leftovers then better plan on 1 ½ pounds per adult and three-quarter pounds per child.
Oh… and did I say leftovers?
I did indeed! I have lots of ideas for them outside the normal turkey sandwich – not that there’s anything wrong with that! But when you’ve had your sandwich fill here are some other ideas:
- Green Turkey Chili – A spicy and delicious take on chili with creamy cannellini beans
- Cornbread Waffle Turkey Sandwiches with Cranberry Aioli – A savory sweet recipe with all the flavors of the holidays
- Roll Up Turkey Casserole – comfort food at its best
- Pizza with Turkey and Roasted Cranberries – It’s pizza night made with leftovers – and they’ve never tasted better
- Turkey and Stuffing Waffles – and fun grab-and-go snack
Thawing Your Bird
I’ve definitely been in the predicament where I buy a turkey and decide I want to cook it sooner rather than later. And luckily for me (and everyone reading), I found that you can indeed thaw a 16 lb turkey in about 4-5 hours – whew! With the water running for 4-5 hours, with is sitting in water for 8 hours. A smaller turkey will be done quicker a larger turkey will take longer. I’ve thawed 20+ lb turkey in water overnight with great results. And I’ve also thawed a 24 lb turkey over two days.
My secret method for thawing a turkey is cold water in a cooler this size. You may be tempted to throw your bird in warm water to make the thawing go quicker, but that would be a big mistake! The long answer for this can be found HERE, but for a quick experiment take a glass of warm water and a glass of cold tap water and throw ice cubes in them – notice which melts quicker? That’s right, the glass with cool tap water.If you’re trying to hurry up the thawing process, change out the water every hour.
Change out the water to make the thawing go quicker(dump the water from the cooler and refill it, throughout the thawing process to speed it along) keep the water running so it circulates to thaw quicker or just let it sit in the cooler filled with water and flip it over 1/2 way through the thawing process.
Want to thaw out more than one turkey use a large cooler like this.
But you didn’t come here for a science experiment, you came here to talk turkey!
You can also just set your turkey down in your fridge about three days prior to cooking. My favorite method however is the cooler and water – it’s been tried and true for years now.
You can put a weight on top of the turkey if you’d like, or flip it over 1/2 way through the thawing time.
Still looking to make this process go faster. Leave the water running very slowly in the cooler. The water circulating will speed up the thawing time.
What do I do if I can’t get the gizards out of the turkey as it’s still frozen and I want to cook it?
Once the wrapping is removed and you realize it’s still frozen, place it bake into the cooler and fill it with water. Leave the water running very slowly and it should be an hour and then it’ll be completely thawed.
What should I put on the outside of my turkey?
I prefer my turkey with butter, salt, and pepper. I’ve spiced it up many times, but ultimately I keep it simple. When I spice it up I add some garlic powder, onion powder, poultry seasoning, and rosemary to the bird. You can use avocado oil/olive oil and any seasonings you’d like.
I’ve eaten lots of turkey over the years, spiced, cajun, fried, brined both wet and dry, herbed, fruit stuffed, garlic herb, rosemary, and bacon-wrapped while all delicious in their own way. I really prefer a simple turkey with butter salt and pepper. But I encourage you to try the seasonings you like best and enjoy.
This is my favorite all-time method for cooking a turkey!
Let’s Get Cooking
There are a vast number of recipes out there for turkey, and a lot of it boils down to taste and time. So I compiled a lot of options, but first…
To Brine, or Not to Brine?
Brining is known to add a lot of flavor and ensure moisture if using a wet brine, there are many options in flavors, and along with wet brining there is also dry brining.
- Dry brine: Less mess and uses spices you probably already have on hand. Prepping includes a good rubdown of the bird with spices, salt, and pepper and then wrapping it tightly in plastic wrap, then refrigerating the turkey overnight. This dry brine recipe looks great.
- Wet brine: This brine method produces a juicy turkey; you do want to be sure you get your seasonings right or you risk your bird not being flavorful enough. It does require some extra space and planning. This wet brine recipe sounds great!
I have eaten brined turkeys and while they tasted good, I don’t feel the need to brine mine, I do prefer the slow roasted method here.
Deep-Fried Turkey
It’s been growing in popularity for years now, and for good reason – it’s crispy and delicious! It comes out perfectly golden brown and elevates plain old turkey to super-star status. They do take a bit more prep as most require bringing the turkey. And if that scares you, don’t let it! It’s very simple and requires very little equipment – plus the results are fabulous!
Here is one of my favorites:
Deep-Fried Turkey – I love everything about this post. For one Paul is a friend of mine, two.. I was lucky enough to be there at his home on the day he fried these turkeys and I even was lucky enough to take one home with me. It was so delicious. He really has mastered the art of frying turkeys. And his brine recipe is great too.
Air-Fried Turkey Breast
Air-fryer turkey is juicy and amazing! You can choose to brine it or not. Here’s a great post that will give you a great option for air-frying a turkey breast. Give this air fryer turkey breast recipe a try.
Roaster Turkey (Cooked in an electric roaster)
Electric roasters are amazing little contraptions, they save time and trim work off of your load. Their lids are self-basting which helps you there, and they are really simple to operate. As far as size goes, a roaster can generally hold its capacity plus 4 pounds…so an 18-quart roaster can hold a 22-pound turkey. These handy little guys cut cooking time too. I found lots of great information on using a roaster for cooking a turkey here, and this looks like another great recipe.
Electric Roaster
Traditionally Roasted Turkey
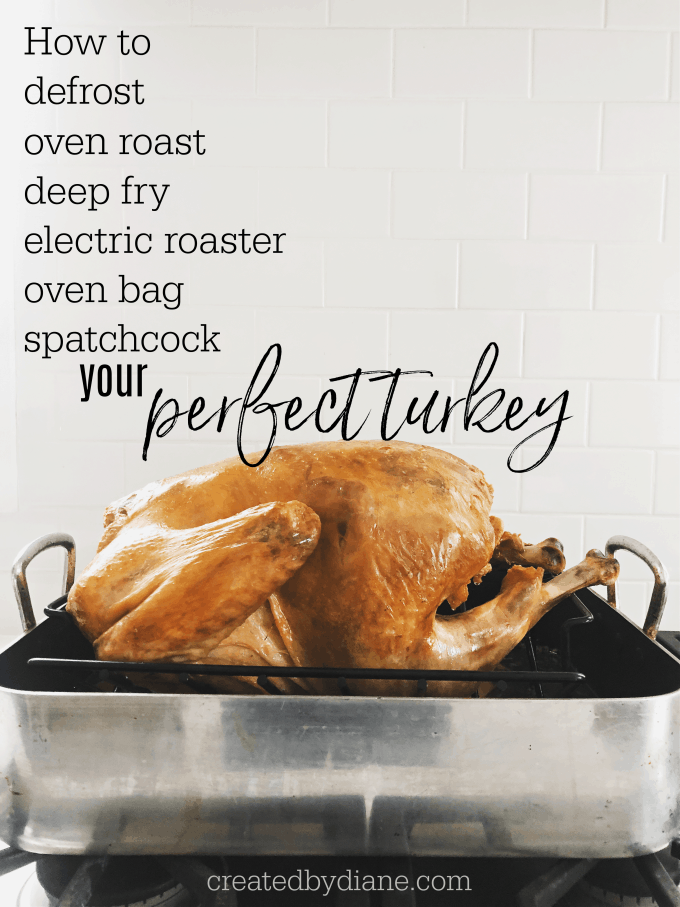
Though I love all of the above newer ways to enjoy our turkey, my favorite is roasted in the oven the way mom made it. A good rule of thumb for cooking times and temperature for a turkey that weighs 12-14 pounds depending on how long you’d like to roast it are:
If you roast above 375° I suggest you use an oven bag to roast it in so it stays juicy. My preferred method is slow roasting at a lower temperature.
- 425°F for 3 to 3 1/4 hours.
- 400°F for 3 1/4 to 3 1/2 hours.
- 350°F for 3 1/2 to 3 3/4 hours.
- 325°F for 3 3/4 to 4 hours.
- 250°F for 5 to 6 hours
- 200°F for 5 to 6 hours
*I choose to roast my turkey overnight, I start it about midnight and it’s ready in the morning, then I carve it and place it all on a try and just heat it up before serving, It saves a TON of time and stress, and always comes out perfect. There is no rushing. And when you’re hungry you can eat, no waiting until the bird is done! No worry it won’t be cooked, or it’ll be tough. It gives you plenty of time to take side dishes and clean up so after you enjoy your meal you can relax.
- More times and temps according to turkey size can be found HERE
Be sure to always use a meat thermometer to check the temperature of the turkey. It’s best to check the inner part of the thigh as well as the thick part of the breast. The breast should be at least 165° and the thigh at least 170° although I prefer my turkey roasted a little hotter at least 10 degrees hotter than what is typically recommended. All white remaining juicy.
I started using this thermometer, and still have it, but THIS one is my all-time favorite instant-read thermometer I give it as gifts and I always get huge thank yous and everyone says the same things, it’s the BEST thermometer!
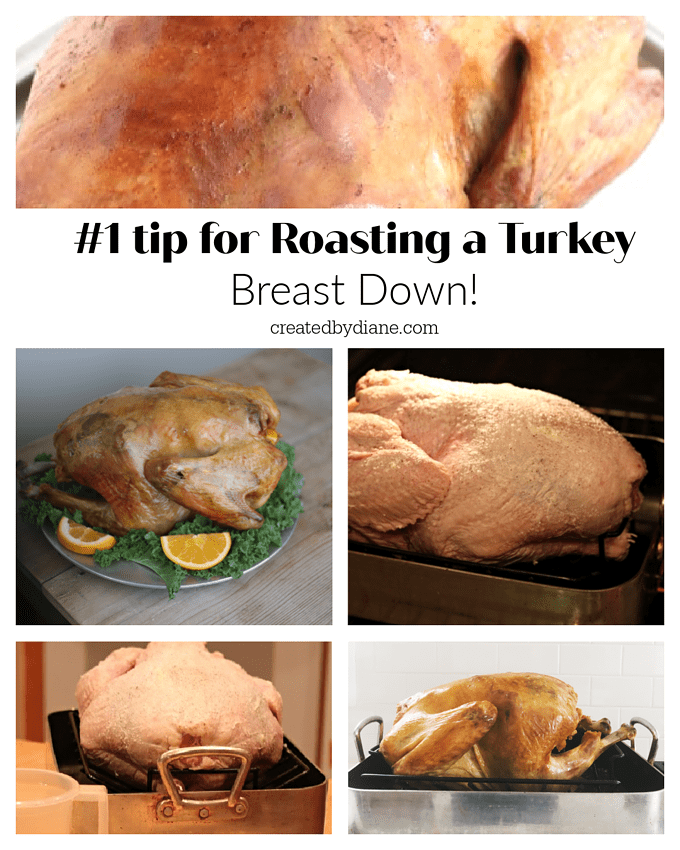
MY #1 tip for Oven Roasting a TURKEY:
Breast Down, juicier white meat as all the drippings run down to the breast ensuring it won’t be dry.
Yes, the turkey will be upside down in the pan! I carve my turkey before serving (I don’t serve a whole turkey on the table like they do in the movies) so it does not bother me that the turkey is not breast side up. But I have flipped the turkey to brown it, so if you want a pretty show-stopping breast side-up turkey, carefully flip the turkey (use turkey forks, I have these) to easily flip the turkey and they work great for transferring the turkey to the cutting board, and they also work great for ham, roasts and other large items you may cook.
Oven roasting bags
Oven roasting bags have been around for years. It’s a great way to ensure tender juicy turkey, give them a try if you have trouble roasting turkeys.
Faster Cooking Turkey- Spatchcock
And if you’d like to roast a turkey, FASTER… this method considerably cuts down on time, my Spatchcock Turkey method is for you! It comes out moist and delicious, and it’s easier to trim – making it a bit less messy. The turkey is butterflied and flattened, then roasted.
Cutting up a turkey smaller to cook faster
If you’re short on time and want your turkey done quickly cut it then roast it, cut the turkey up (just as you would a chicken, or if you haven’t ever cut up a chicken like you see pieces of chicken on the bone in stores) Cut the legs off, then the thighs, then move to the wings and breast. Lay all the pieces flat on a sheet pan or in a roasting pan and roast them covered, then uncover to crisp the skin.
Cooking Multiple Turkeys
If you’re unable to find a large enough turkey, don’t worry just buy two smaller turkeys. I have done this many times and it’s a great way to be able to carry and manage if you’re doing all the heavy lifting yourself. I can easily fit two 16 lb turkeys in my oven side by side. (I have a wall oven) so measure what size pans will fit in your oven and give it a try. Disposable foil roasting pans work well for this as they are flexible to adjust in the space you may have in your oven.
My #1 tip for roasting any size turkey is to roast the turkey breast DOWN!
Be sure to check out my super easy Overnight Roasted Turkey! It’s low and slow, and just like good BBQ, this method produces the best flavors you could ask for! It saves so much hassle the next day, as it cooks while you sleep and when you’re looking for room in the oven to do all your side dishes the next morning, this dish plays the hero. And the turkey is often around 175° when it’s done, the bones begin to break down more than the faster roasting methods and the meat comes off the bones easier.
If you are trying to hold your turkey over for a few hours if it’s done easily, just turn the oven to 200°, cover the turkey with foil, and leave it in the oven. It’ll keep the turkey warm and result in great great-tasting turkey.
*Allow the turkey to rest for at least an hour. Then, slice it, place it all on a platter, and cover it with plastic wrap. Place it in the fridge.
If you’re worried about serving cold Turkey, don’t be…
I have a fail-proof way of reheating:
- An hour before serving, take it out of the fridge and place it on the counter, unwrap it for about a half hour.
- Place the sliced turkey on a baking sheet or in a roasting pan in a preheated oven at 300-350°. Avoid overheating and drying it out by covering it with foil or spritz it with water (or chicken broth) if you feel it’s necessary. The turkey is the first thing to cool off on a large meal, if your gravy is HOT, everyone will love it. As long as the turkey is not ice cold, it will be enjoyed!
- If you want to heat it in a skillet on the stove, place some water or chicken broth in the bottom of the skillet with a rack in it, a vegetable steaming rack, or a flat roasting type of rack to have the turkey above the simmering water or broth.
- I have an amazing versatile gravy recipe for everyone to enjoy.
Whatever you’re in the mood for this holiday, I have plenty of recipes for you to try, give my recipe index a look to find something new.


Can I cook a turkey overnight in an electric roaster?
Yes, I’ve heard back from people who used the slow overnight cooking method for turkeys in an electric roaster with great results. You can raise the temp the last hour to brown it if needed.